Thursday, 30 June 2011

Inspiration Board 2 - Rag Rugs

Continuing from yesterday, another technique to make rag rugs and my favourite is called the Shaggy Rag Rug.  This style of rug is not flat, instead the fabric is knotted through a mesh and the ends left loose so it stands up like a shag pile carpet.  This is the technique I remember doing at school so I really wanted to try it out again myself.

These rugs can be made in variety of different ways, using an open mesh it is possible to just thread the fabric through and tie it off.  Or Hessian can be used to create a much tighter weave but to thread the fabric through you may need to use a hooked needle.  Here are some designs and tutorials I am using for inspiration, to find more look on my Rag Rug Pinboard:


1 - I love how you can incorporate a design like this multicoloured Union Flag Rag Rug from Folksy.
2 - This tutorial for a Patchwork Shaggy Rag Rug is brilliant.
3 - Rag Heart decoration from Folksy. 
4 - A Shaggy Rag Rug Tutorial from Etsy.
5 - Yet again another favourite from Urban Outfitters this Yellow Shaggy Rag Rug.
6 - This Bath Shaggy Rag Rug is made from towels.
7 - This Little Field Of Flowers Rug isn't strictly a Rag Rug but it uses the same technique, I just love it.
8 - Polka Dot Shag Rag Pillow from Folksy.

I recently received a large batch of fabric offcuts from a friends of my Mum's, even though they are not exactly the designs and colour I am looking for I can't say no to free fabric and it's a brilliant way to get started so I can experiment and see how much fabric I am likely to need if I were to make more.

~Sarah~

Wednesday, 29 June 2011

Inspiration Board 1 - Rag Rugs

I was very lucky to go to a Primary School where all the teachers and TA's loved crafting, I learnt an awful lot and have kept going ever since.  I was recently talking to my Mum, who works as a TA at my old Primary School, about one such craft - creating Rag Rugs.  I don't really remember the finished product, but I definitely remember making them the rugs, tearing/cutting up fabric scraps and threading it through a large piece of hessian.

There are two types of rag rug, the first which I will talk about today uses fabric scraps are knotted, crocheted or plaited together to create a flat surfaced rug.  Most are round or oval as this is an easy shape to make, but some make use of a mesh which can be worked into.  One common technique is to use a hooked needle to push and pull the fabric through the mesh, just like in picture 6 below.

I found these examples below on Pinterest but where possible I have linked them directly.  I have collected a much larger selection on my Rag Rug Pinboard, these are some of my favourites:


1 - I love this plaited Sun Burst Rug the graduation of colours is amazing from Etsy.
2 - A very Colourful Rug with frilled edges from Urban Outfitters.
3 - These Rag Baskets are fantastic, get the pattern from Clotilde.
4 - This Snowdrift Rug makes use of different fabrics, just beautiful.
5 - I like how they have used white to break up the colour in this Plaited Rug.
6 - This Blue Square Rug was made with t-shirts and denim.
7 - Couldn't resist this Purple Rug also from Urban Outftters.
8 - The colour combination of this Gingham Rug is fantastic.
9 - Rag Rug Pillows from East Meets West Antiques.

I'll be back tomorrow with some different techniques to make rag rugs so stay tuned.

~Sarah~

Tuesday, 28 June 2011

So Much To Do, So Little Time...

Over the past couple of weeks I have become very lazy with my blog; with the sudden realisation that I have 3 days to post 3 times to fill my monthly quota, not clever!! I blame Graeme for 2 reasons, firstly, I haven't seen him in ages so want to spend lots of time together, secondly it's been his birthday this week (and I mean week!!) so all attention has been on him.

Happy 25th Graeme, love you xxx

First celebration was TGI Fridays, just look at the awesome Jack Daniels Sticky Ribs, I am in love with this restaurant, the Jack Daniels Sesame Chicken Strips are the most amazing starter ever!! *drool* ok I'm hungry now.


Second celebration was a Xbox Kinect; it is so awesome!! I felt like a little idiot jumping all over the room but it's so much fun!! Although every muscle in my body is aching, that can't be a bad thing, it means I'm exercising!!  Third celebration was an epic BBQ at Graeme's, much fun was had by all, so much so it took me all weekend to recover!!

As the week is now over I am concentrating fully on my blog and crafting - sort of... we recently joined our local sports centre (we like food far too much!!) and are determined to go every workday evening for gym or a swim.  I have been very inspired my friend Erik and his blog Couch Potato to Marathon Runner; he's recently taken up running and has lost quite a bit of weight; he's doing a fantastic, well done Erik!!

This new health kick may not start fully until next month though, as we have also decided to go on a very impromptu holiday next Thursday to Sharm El Sheikh in Egypt for a week. Last minute deals are the best!!  Check out our Hotel the Tropicanna Sea Beach, Graeme was sold by the pool bar, we just can't wait, are you jealous?? 


Alas I am getting side tracked once again, I definitely need this holiday to sort my head out and get organised!!

I promise to start posting crafty things again very soon!!

~Sarah~

Thursday, 23 June 2011

A New Hope

Haha, sorry couldn't resist the Star Wars link, I meant to type:

A New Beginning

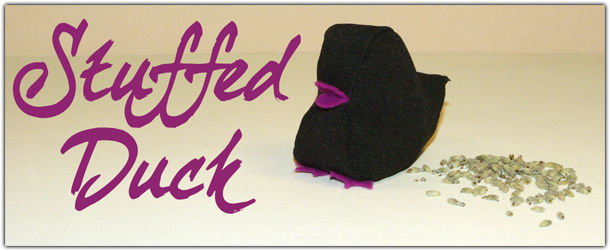
I've made a start on my new design and so far I'm loving it! I really love my little stuffed duck but as it was made of black fabric it just doesn't stand out enough.  Instead I have decided to take the scene and redesign it in photoshop.  I really enjoyed making the recent Titwatch banner so wanted to keep the same style; a bright and colourful vector image with a bold font to stand out.  I chose to colour the duck yellow, but I loved the purple accents so I've kept those, I also added an eye as it looked a little weird without one.  I still wanted my duck to be stuffed but it's now a lot easier to demonstrate this with lavender sticking out of his back.  I'm really pleased with the lavender it looks so pretty may have to use this design elsewhere.  This is my favourite style of drawing so I hope to continue it throughout all my designs.

So I shall say a fond farewell to my old header...


And I hope you like the new one; I think you will agree it is a lot more colourful and fun!!


Recently on blogger we have also been given the option to add our own Favicon to our blogs; check it out my little duck is up there too, she is so cute!!


Another development is from now on I plan to watermark all of my photographs.  I thought long and hard about doing this; I'm not so worried about protecting my work, but I want to get my name out into the big wide world and when people see my images they will know where they are from.


I've also been playing around with border styles, to jazz up my photos a bit more, tell me what you think; is it just too much? Or should I make them stand out more??

Wednesday, 15 June 2011

Time for a Change

I have been writing on this blog for over half a year, how time flies when you are having fun.  What is even more unbelievable is that when I first started writing I envisaged this blog would be for me to share my crafting endeavours with a few friends, but it has become so much more.  I will admit I have gone slightly off track from my original aim and tend to post about anything happening in my life, but I'm still finding my footing, I hope to find the right path and style soon.


Over the next few weeks I will be redesigning my blog, to make it much more colourful and crafty and a lot more like me.  I want to include a theme throughout my posts to make them unique to me and really stand out from the crowd.  One of my favourite posts, the tutorial for a fabric flower head band, really racks up the hits and I want to deliver more of this kind of thing to draw in the crowds and keep their attention.  I also aim for a bit more structure and hope to include more reviews of my favourite blogs, websites and fun things from around the internet on a weekly basis.  If you have any suggestions please let me know, I'd love to hear from you.

Thank you all for following!!


Sunday, 12 June 2011

Magic Magnets


I recently got hold of some sheets of magnet and just knew I had to do something with them.  I recently made up a bit of care package for Graeme to see him through his exam revision and decided I could include some fun magnets too.  I picked one of Graeme's favourite hobbies, a card game called Magic, which is made up of 5 different groups of cards, White, Red, Blue, Green, Black.  I had a quick browse around the internet for some decent images but couldn't find anything I liked or were large enough.  I ended up taking a tiny image of the badges from the magic website and redesigned them in Photoshop with better backgrounds so I could print them off much larger.


Before we go any further, Yes, I have attempted to play this game and No, I didn't get on with it.  Mainly because I lost and couldn't really see the point of playing again.  Graeme is determined to teach me so I will have another go but only if he promises to go easy on me and give me a really good deck of cards.

One thing I didn't think about when designing was how to cut the magnets into a perfect circle.  I did try using one of Dad's drills but this gave a very rough edge and I knew I could do better with scissors.  Note to self: Next time design square magnets!! After cutting (which seemed to take forever) and sticking the paper designs on, the magnets just didn't feel finished, so I went online to look for a glaze I could cover them in.  The best one around seems to be Aleene's Paper Glaze, which gives a raised and glossy finish.  This I could only order online though and I didn't have the time or money, so instead I set about trying to make my own glaze.

Attempt 1: First thing to try of course, was clear nail varnish.  This gave a really nice glossy finish but soaked into the paper and made it all blotchy. FAIL

Attempt 2: Good old PVA glue.  This goes on white but dries clear so worked really well, although a thin layer didn't make any difference at all, so I ended up putting on a really thick layer to see if it would be raised. This didn't work, the glue dried in clumps and the edges of the paper went all wavy, but at least it didn't soak into the paper. FAIL


Attempt 3: Learning from mistakes I used a mixture of my two previous attempts.  Firstly a thin layer of PVA glue to seal the paper.  Then when it was dry I went over with clear nail varnish for a glossy finish.  It worked perfectly and the result was exactly what I wanted and I didn't have to buy anything, very resourceful!!


Graeme loved them, he probably like the booster packs of Magic I got him more but I'm ok with that.  Now I just need to decide what to design next, something most definitely with straight edges!!

I also want to congratulate Graeme on finishing his final exams and final year of Uni, can't for you to get home!!

Monday, 6 June 2011

Titwatch - Goodbye


This will be the last Titwatch post as when we woke at the weekend the babies had already started to leave the nest.  Dad noticed a lot of hussle and bussle about outside both Lady and Old Blue were sitting on the washing line outside the nest box chirping away.  He took this last video of all 5 chicks together having their morning feed.


When I came down to breakfast 2 of the babies had already left and I rushed to turn the camera on to catch the remaining 3's last moments in the box.  As you can see they are flying as best they can inside the box even coming right up to the camera.  I literally just caught the tail end of the 3rd chick leaving the nest.


The last 2 were a bit more hesitant, one kept flying to the hole and then got too nervous and go back into the box. They seemed quite happy to stay where they were and be fed more by Lady and Old Blue and play with each other in the box.  Just as this clip ends did the number 4 leave the nest.


And then there was one, this baby is a little smaller than the others but finally got the courage to leave.  All of them roosted in a tree at the bottom of the garden over night and I'm sure we heard them chirping away the morning after.  I'm sad to see them go but hopefully they will be visiting us again next year.


Thank you all for following I hope you enjoyed it.  If you would like to see some extra footage check out our youtube page.  Or revisit my whole series of posts by clicking on the Titwatch image below.

Saturday, 4 June 2011

Titwatch


The chicks have finally broken free of the nest.  They now quite happily flap around and stretch their wings, it's amazing to see but also quite sad as very soon now they will be leaving us.  All 5 babies are strong and healthy, unfortunately the runt of the family died early on so these 5 have been very well fed by their parents.


We also spotted an unhatched egg, this must have been from the previous inhabitants and just got buried at the bottom of the nest.


Lady is no longer roosting with them at night as they are so big, so instead they huddle together for warmth.  You will notice some of these videos have sound; the motion detector doesn't record sound but if we record manually it does.  The chicks really do chirp away all day chatting to each other they are so cute.


Friday, 3 June 2011

MCM Expo Spring 2011 - part 2

...continuing from yesterday here are some more awesome cosplayers we spotted at the MCM Expo.


How amazing is this Alien costume, everyone wanted their picture with him, we all felt bad for the army guy with him as the Alien was getting all the attention.


I thought it amusing he had a collar on, I thought nothing could keep the Alien leashed!!


These two characters are from another anime and manga series I have read, watched and loved called Chobits.  The girl in white is Chi, the other is Freya.


Lara Croft and a huge gun!!


Sarah's favourite snack, Pocky!!


I bought quite a bit at the show, including the rest of Scott Pilgrim series, the graphic novel of Pride and Prejudice (I'm very into Jane Austen at the moment, just finished the book).  The craft your own Star Wars book, which is for children but when has that ever stopped me!! I also bought a new manga called Dragon Heir by a group of English writers from Sweatdrop Studios.  I bought Telling Tales last year which was great so had to get another this year.

Scott also decided to buy a little purchase for his brother, I have been informed that this is the Gunblade from Final Fantasy VII.  We had to make sure it was 'ok' so had a play outside!!

Scott looking menacing(ish).


Sarah a little gay.


Me stroking the sword.


Some other cosplayers decided to join in!!


Outside were just as many cosplayers as inside, just love this Power Ranger, just standing watching proceedings.


These guys are from Final Fantasy I think??


Godzilla, talking to two halves of a Unicorn.


We also spotted an interesting game of skipping.  Where else would you find Kick Ass, the Jolly Green Giant, Picachu, Alice in Wonderland and Naruto skipping together, it was a great sight to see.


To finish the day we decided to get ice creams, yum!!


I also decided to pose at the riverside, it was really windy!! Ok so maybe I am persuaded to dress up next time.


Thursday, 2 June 2011

MCM Expo Spring 2011 - part 1


Sarah, Scott and I decided to go to the MCM about two weeks ago so had no time to plan costumes (I would have wimped out anyway I know!!) But we wanted to add a bit of geekyness to our attire so Sarah and I decided to design some freezer paper t-shirts.  Our first idea was 'Titwatch' t-shirts to advertise my blog, but I just knew cutting out all the letters with a craft knife would have taken ages and we were making them the night before.  So instead we went for Lego Storm Troopers from the same design I used for Graeme's painting.  To add a bit of mixture we made Scott a Lego Darth Vader which turned out amazing thanks to Rachael's painting skills, thanks for the help!!


This is my second time at the MCM Expo and one thing I have realised is that Sarah an I are not as big geeks that we sometimes think we are.  I didn't recognise half of the cosplay costumes and had to keep asking Sarah who they were; even Sarah didn't recognise some though so if you spot one I haven't labelled correctly let me know!! 

I have know idea who this first group were, but I liked them!


This wasn't a cosplay it was a model from the set of Doctor Who, it's of the Tardis and the Dalek's creator Davros.


I knew who this guy was and even managed to ask for a picture.  This is from a manga and anime series called Inuyasha.  I'm proud to say that I have watched all 182 episodes and bought loads of the manga, this may be a series I have to revisit again!!


Oh I and I know these character too, Mario and Luigi.


This group of steam punk characters we didn't recognise, but the guy on the right had the best costume.  When I first saw him I really did believe that it was two people, one carrying the other in a trash bin, but no, this is one costume, awesome!!


One thing I love about MCM is how random it can be, this was a conga line we spotted making its way around the building.  And yes that is Pedobear with the Jolly Green Giant at the front, just amazing!!


Kick Ass!!


A couple of Na'vi.


As this post is starting to get epically long, i'll carry on tomorrow, but lastly Where's Wally??